How to Install the Local Preview of Gitpod Self-Hosted
⚠️ Gitpod Self-hosted has been replaced with Gitpod Dedicated, a self-hosted, single-tenant managed service that runs in your private cloud account but is managed by us.
Try out Gitpod Dedicated.
| Status: | Beta |
| Intended for: | The Local Preview allows you to experience Gitpod Self-Hosted on your local machine without having to set up a Kubernetes cluster. It is purely intended for testing purposes. Please see the installation guides section for recommended sustainable installation methods. |
| Limitations: | - Performance is limited by the capabilities of your machine. Your experience is likely to be better when using the SaaS version (gitpod.io) or when running on one of our reference architectures - Minimum of 4 cores and 6GB of ram required. Macs with Apple Silicon (e.g. M1) are currently not supported. See the relevant issue for more information - Prebuilds are not supported because they require webhooks |
The Local Preview of Gitpod Self-Hosted is the easiest way to try out Gitpod locally in situations where you cannot use the SaaS version (gitpod.io) and cannot easily spin up a Kubernetes cluster to use the Proof-of-Value Reference Architecture. It allows you to try Gitpod Self-Hosted locally with minimal effort and resource requirements. As a result, this is not intended for production nor continuous usage. Please refer to the installation guide for instructions on how to install Gitpod for continuous usage.
This install method runs a K3s cluster inside a Docker container. Self-signed certificates are automatically created and a Gitpod instance using these certificates will be installed into the k3s cluster. See our TLS page for more information about Gitpod and certificates.
1. Running the Docker container
Run the following command to get the local-preview Docker container up and running:

 language:
 docker run -p 443:443 --privileged --name gitpod -it --mount type=volume,source=gitpod,destination=/var/gitpod eu.gcr.io/gitpod-core-dev/build/local-previewUnpacking the above command:
-p 443:443to map the443container port to host.--privilegedto be able to run docker (and hencek3s) inside the container. This is necessary.--name gitpodto set the name of the docker container for further access.--rmto delete the Docker container after stopping.--mount type=volume,source=gitpod,destination=/var/gitpodto create a volume calledgitpod, and mounting it to the container.
Note: By default,
preview.gitpod-self-hosted.comis the DOMAIN to access Gitpod which routes to127.0.0.1localhost IP address. To use another host network IP Address, theDOMAINenvironment can be set accordingly via an-eflag in the above command. This is useful to share access to the Gitpod Self-Hosted instance running on your machine within your local network. For Example,192.168.0.42Host Network IP would be192-168-0-42.nip.io, set by appending-e DOMAIN=192-168-0-42.nip.io.
2. Accessing Gitpod
Note: It usually takes around 5 minutes to go from the
starting Gitpodstatus toGitpod is running. Among other things, this will depend on the speed of your internet connection. Once Gitpod is ready, it will look as follows:

As this is a self-signed instance of Gitpod, the Gitpod root CA cert has to be imported into your browser manually to access the full functionality of Gitpod. The certificate can be retrieved by running the following:
language: docker cp gitpod:/var/gitpod/gitpod-ca.crt $HOME/gitpod-ca.crtThis certificate is saved at $HOME/gitpod-ca.crt and can then be loaded into your browser. Most browsers also require a restart before they can start to use the imported certificate. For instructions on how to load the certificate, choose your setup below:
Chrome on Windows
Edge on Windows
Firefox on Windows
Google Chrome on MacOS
Mozilla Firefox on MacOS
Once the certificate is loaded and Gitpod is ready, the URL to access the Gitpod instance would be https://preview.gitpod-self-hosted.com unless the DOMAIN environment is overridden in which case the same has to be used.
You should be greeted by the following screen:
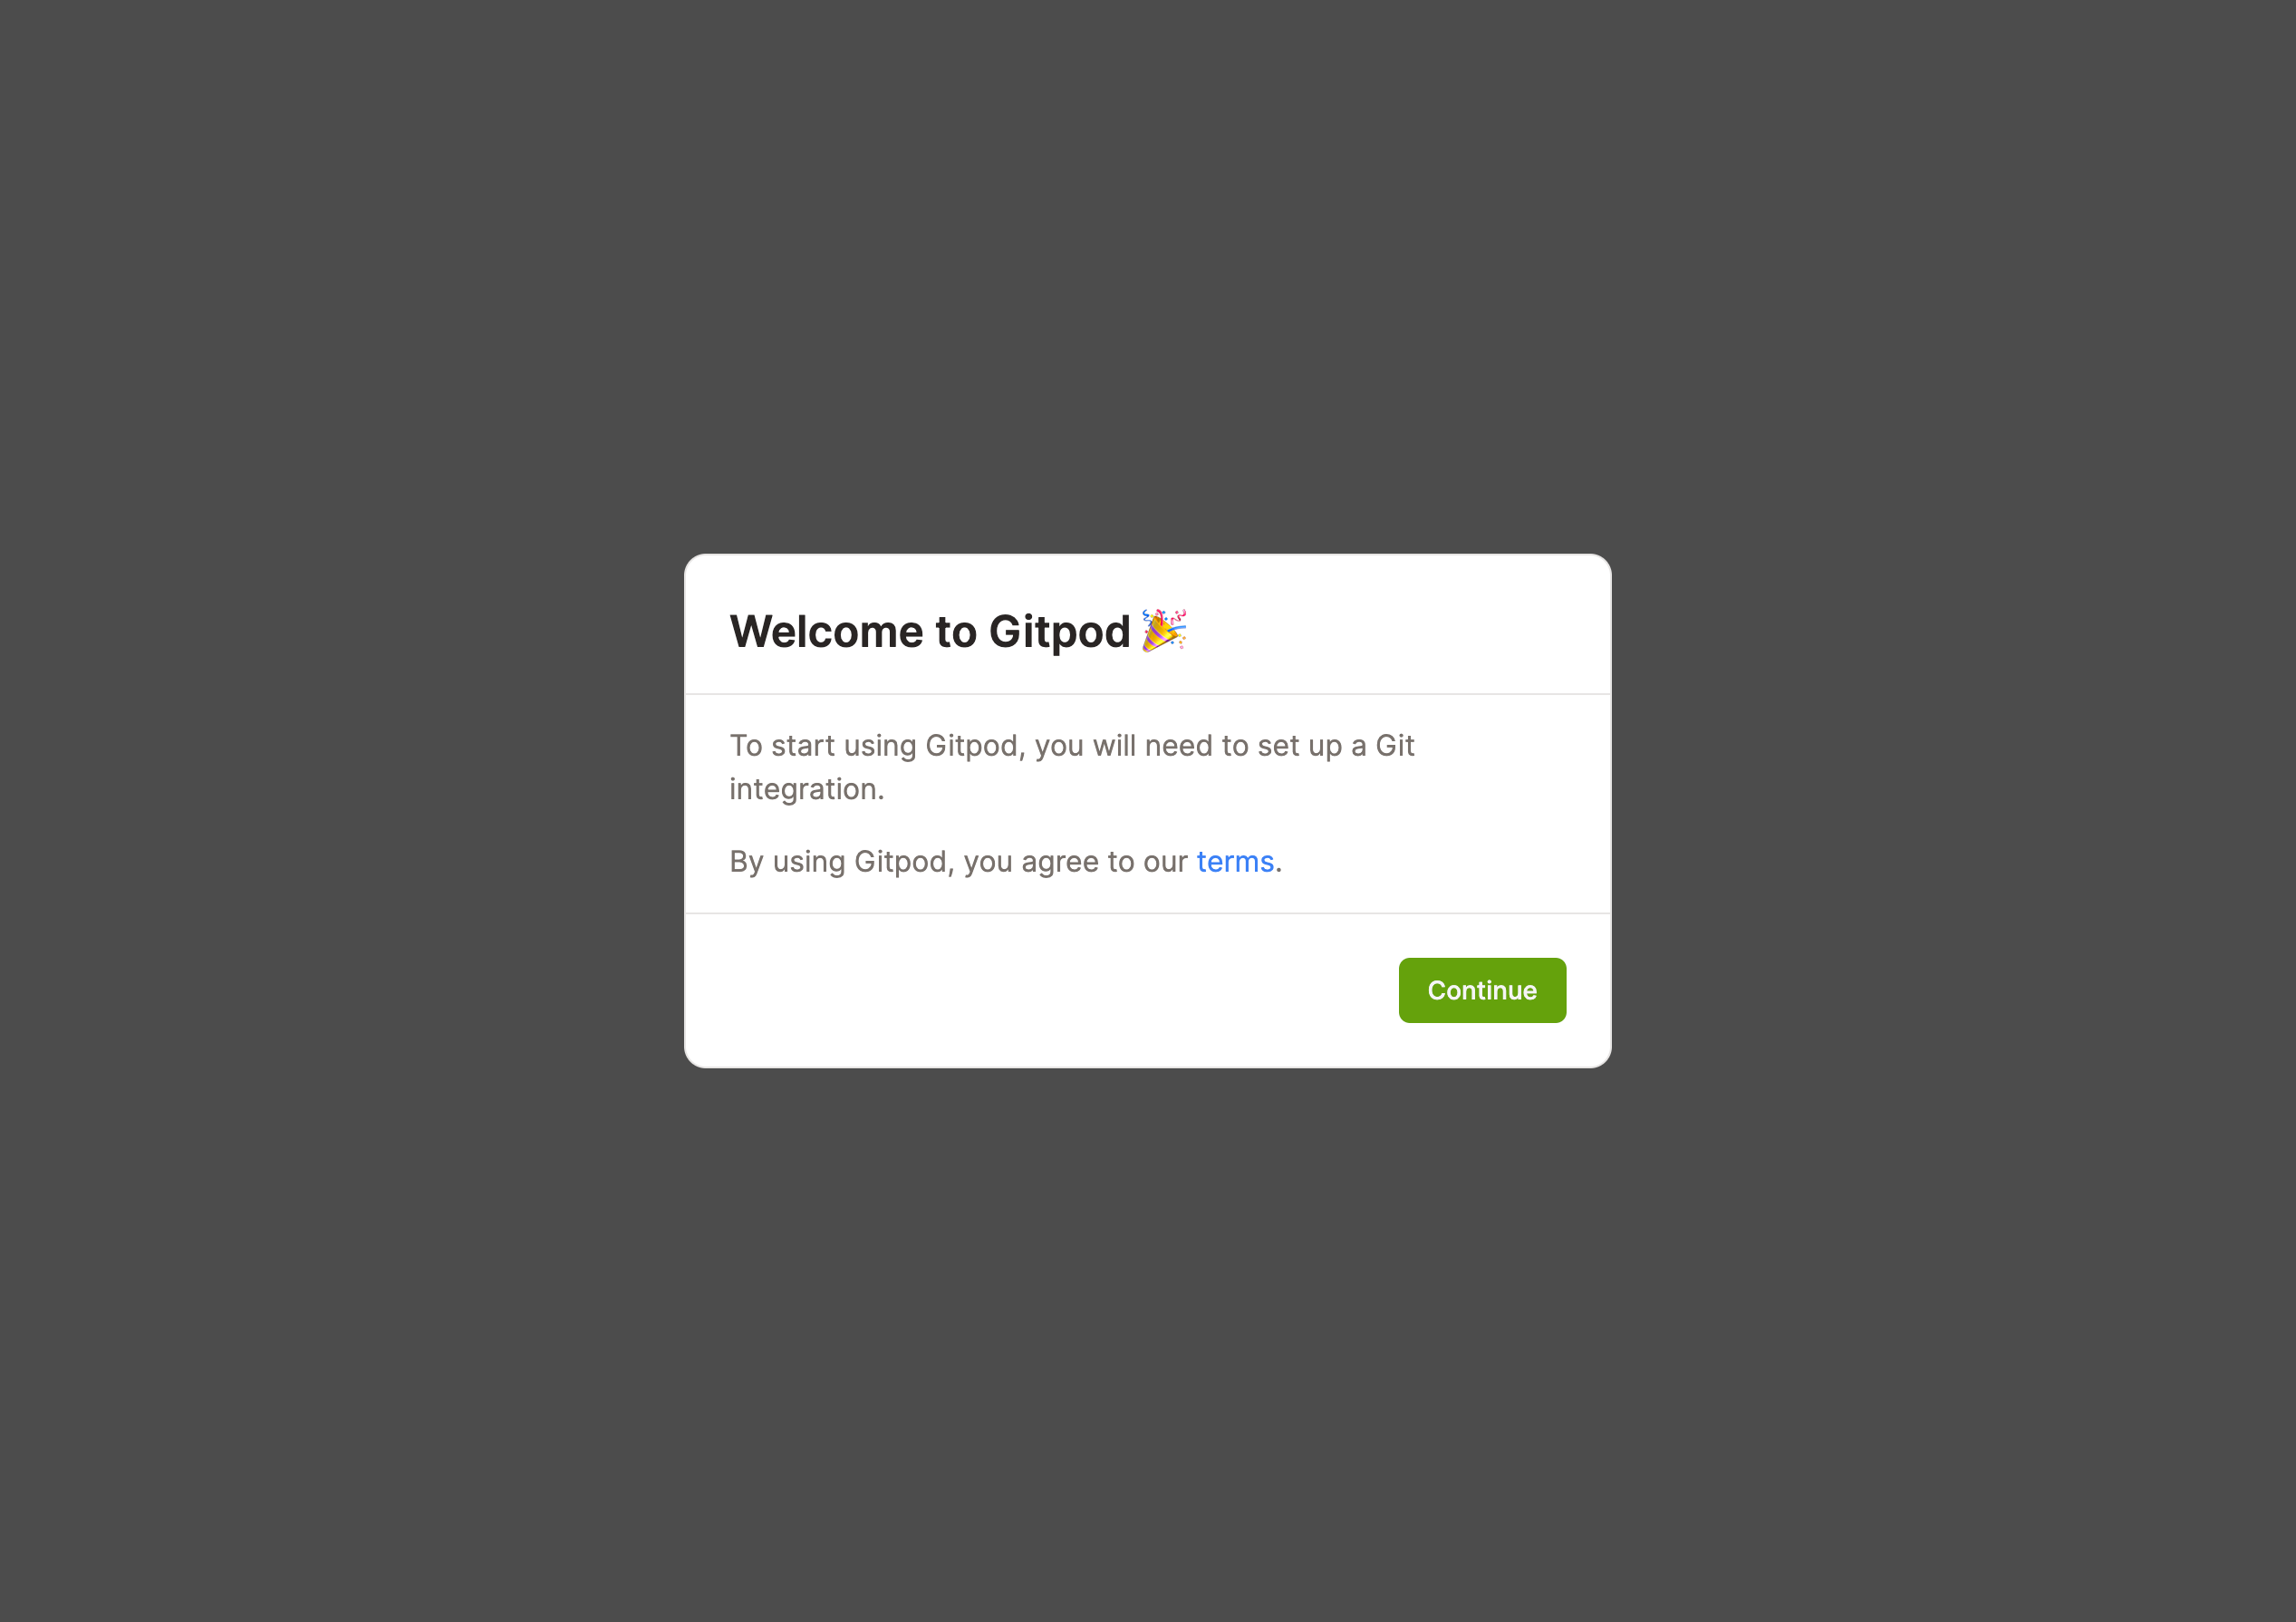
You will then be asked to configure a git integration:
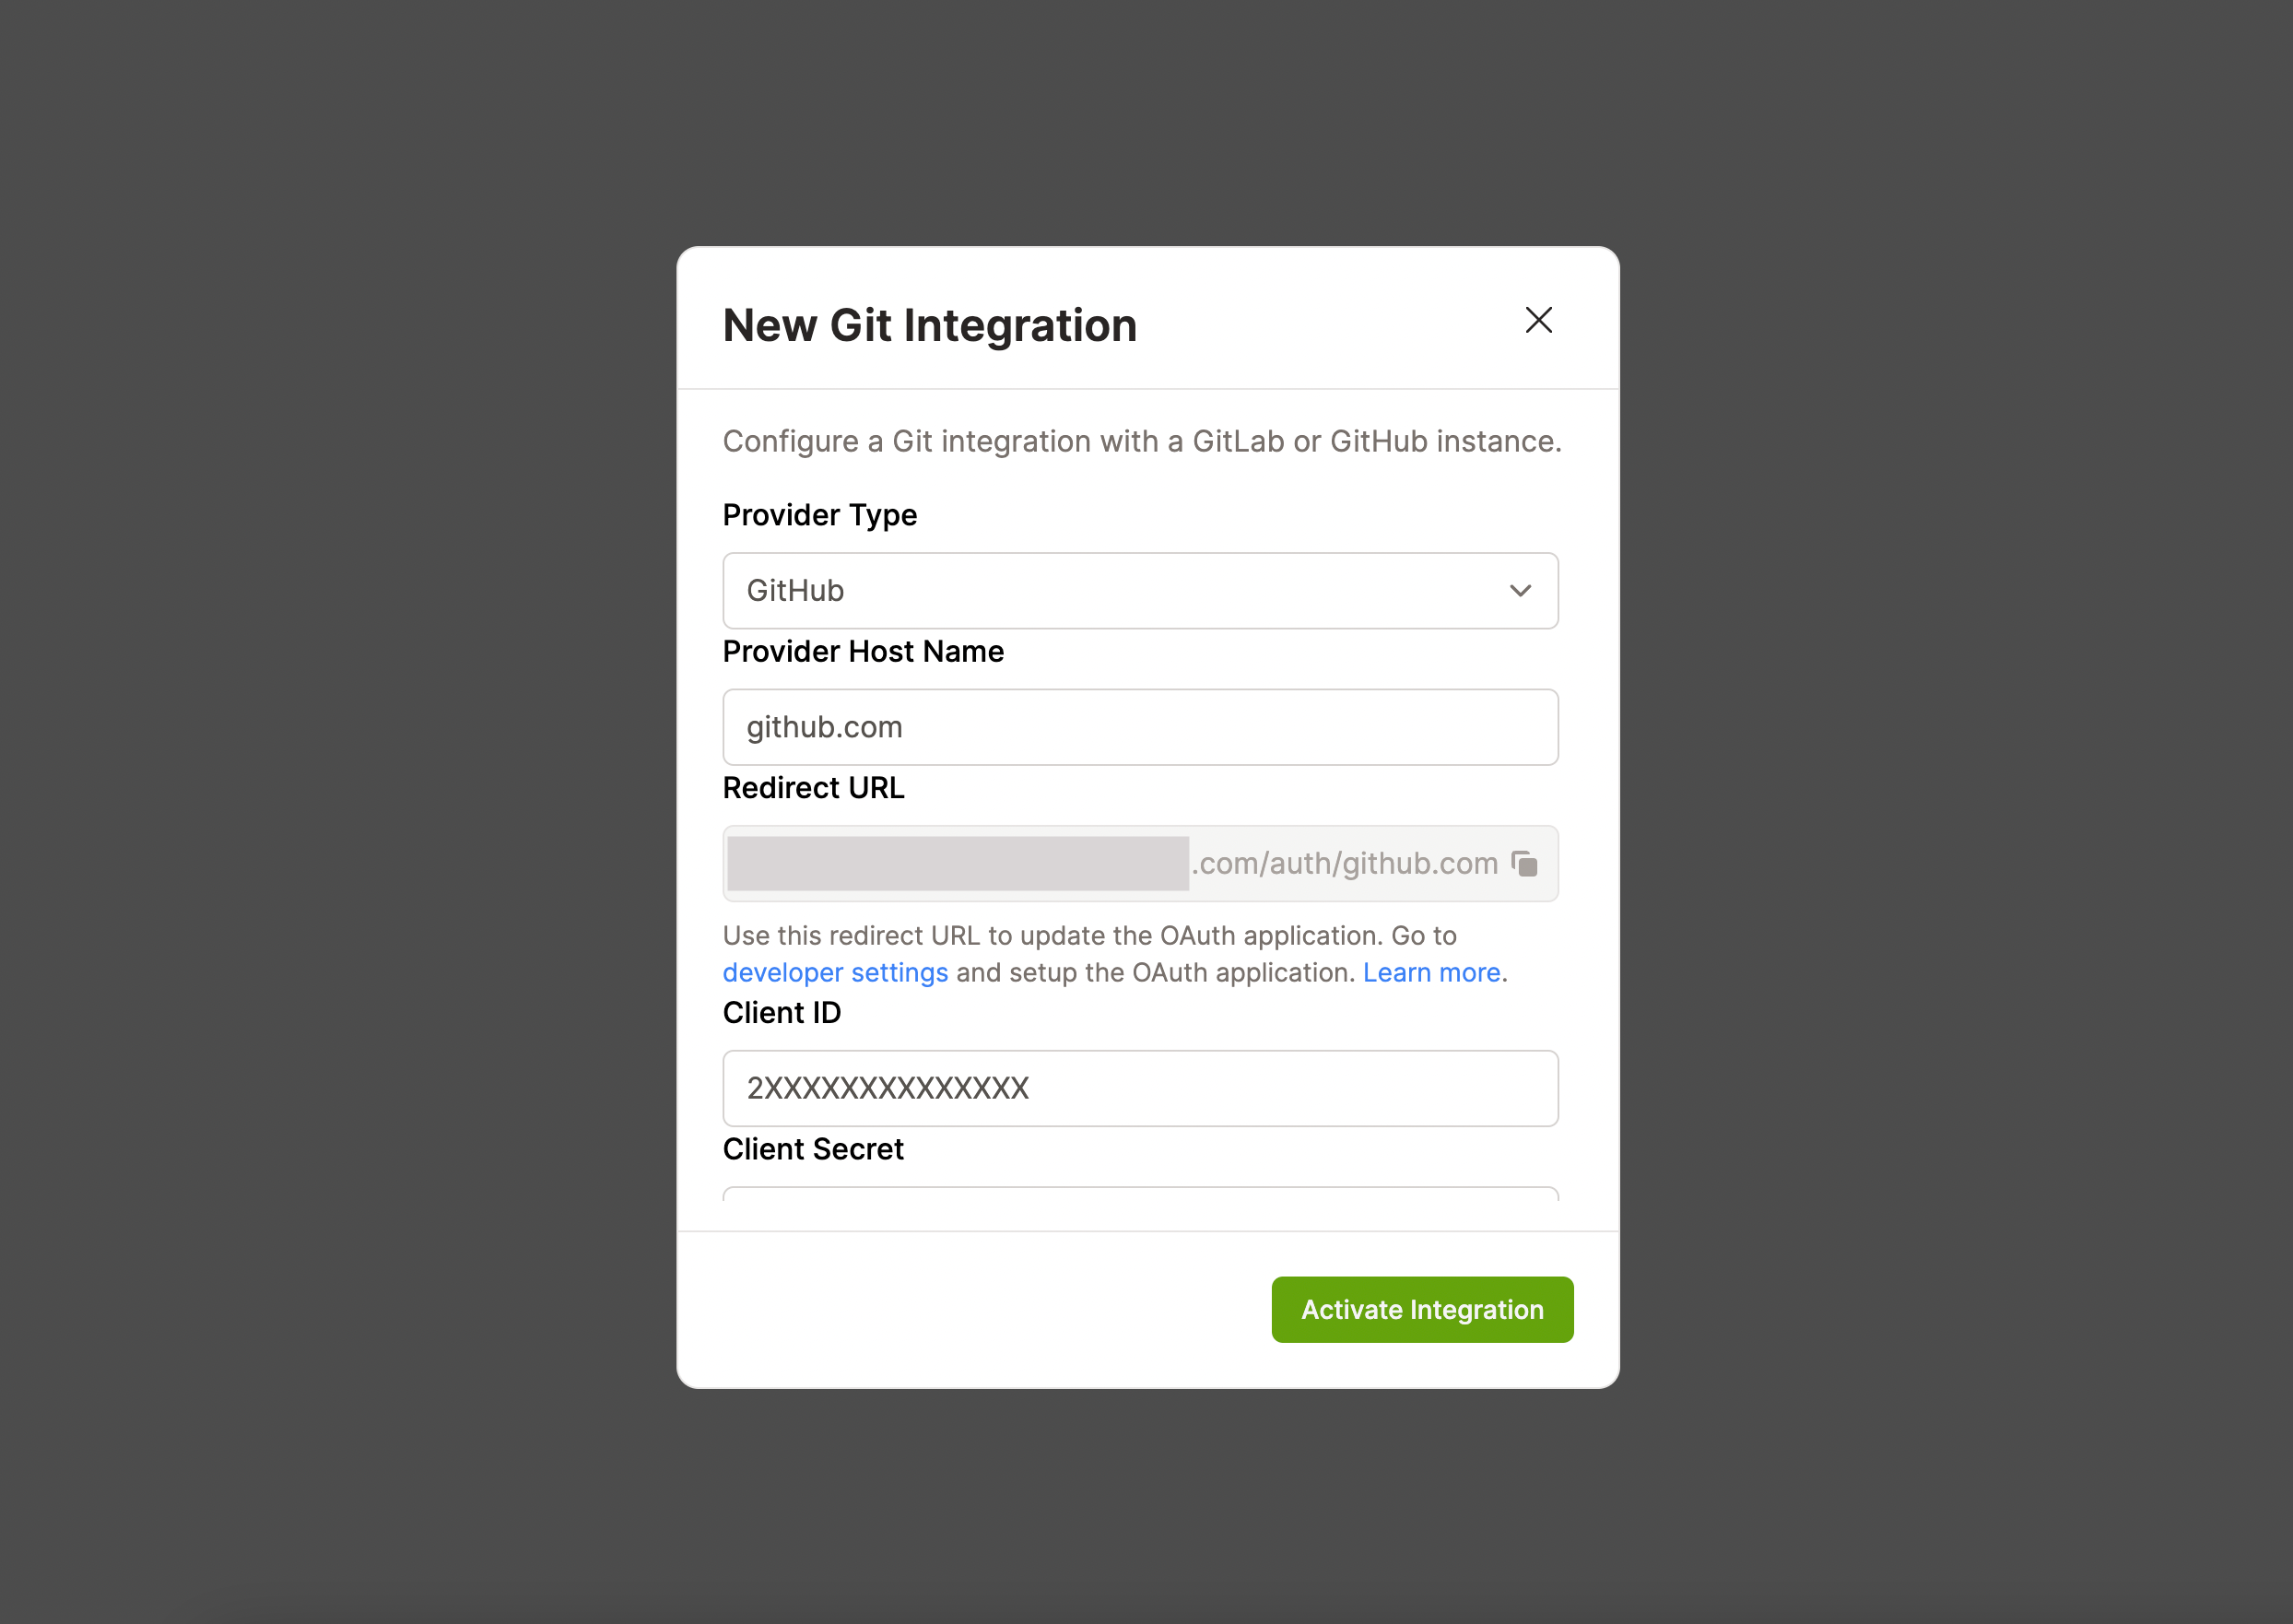
This git integration will also serve as the way that you and your users get authenticated against your Gitpod installation. You can find out more in the Integrations section.
Important: Public (SaaS) Source Control Management Systems (SCMs) (i.e. GitLab.com, GitHub.com and Bitbucket.org) are not integrated by default with a Self-Hosted Gitpod instance because OAuth apps are tied to domains. Therefore, these public SCMs need to be integrated manually with an OAuth application you specifically create for your domain. This is done similarly to how it is done for the private/self-hosted versions of each SCM. As such their respective guides also apply here:
- Follow these steps to integrate
GitLab.comwith your self-hosted Gitpod instance. You will need to entergitlab.comas theProvider Host Namein the New Git Integration Modal.- Follow these steps to integrate
GitHub.comwith your self-hosted Gitpod instance. You will need to entergithub.comas theProvider Host Namein the New Git Integration Modal.- Follow these steps to integrate
Bitbucket.orgwith your self-hosted Gitpod instance. SelectBitbucketas theProvider Typein the New Git Integration Modal. For bitbucket.org this requires configuring an “OAuth consumer” on a “workspace”. This is slightly different from the documented Bitbucket Server integration. See gitpod PR #9894 for an example.
Note: Your first workspace start can take a bit of time because the workspace image first needs to be built and then downloaded. Subsequent workspace starts should be much quicker.
Once you are all set up, you can visit the getting started with Gitpod page to start learning about using Gitpod.