Install Gitpod in an Air Gapped Network
⚠️ Gitpod Self-hosted has been replaced with Gitpod Dedicated, a self-hosted, single-tenant managed service that runs in your private cloud account but is managed by us.
Try out Gitpod Dedicated.
Note: Installing Gitpod in an air gapped network is a feature limited to our Professional Plan. We support air-gap mode for paying customers only.
In this guide, we expect you to have a cluster up and running that meets the requirements and have the required components installed and configured (at least cert-manager is needed).
Preparation
Before you can start with the installation, you need to prepare the following:
- You need to have a Docker registry available in your network where you can push images to and where your Kubernetes cluster can pull images from.
- You need to download installation bundles.
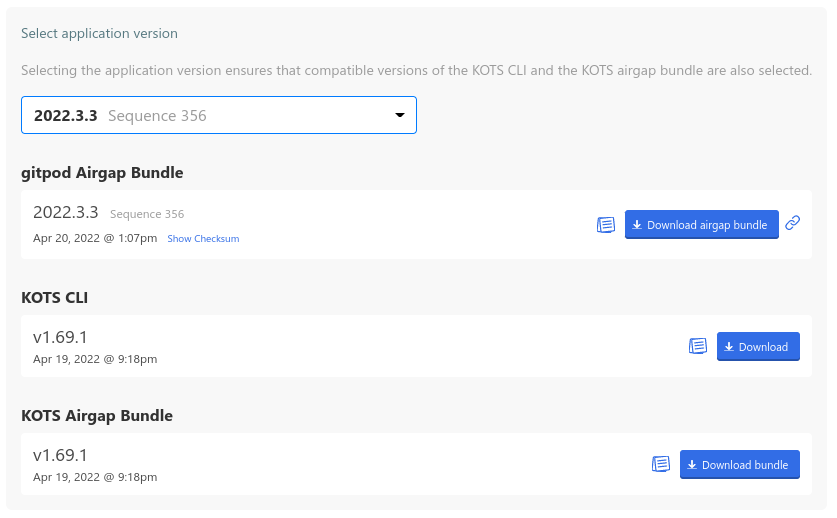
We provide you with a URL and password to a download portal. There you will find the following bundles that you need to download:
- KOTS CLI package
kots_linux_amd64.tar.gz
(provides you with thekubectl kotsCLI binary) - KOTS Airgap Bundle
kotsadm.tar.gz
(provides you with the Docker images you need for the Gitpod KOTS installer) - Gitpod Airgap Bundle
gitpod-<version>.airgap
(provides you with the Gitpod Docker images)

Copy the KOTS CLI package as well as the KOTS Airgap Bundle to the machine where you are able to run kubectl.
Install KOTS CLI
Unpack the KOTS CLI package kots_linux_amd64.tar.gz, rename the binary kots to kubectl-kots, and copy it to /usr/local/bin/ (or to any other folder that is in your PATH).
Now, you should be able to run the following command:
$ kubectl kots helpInstall Gitpod
At first, you need to push the images that are needed for the installation admin console to your registry.
$ kubectl kots admin-console push-images \
    ./kotsadm.tar.gz \
    <registry> \
    --registry-username <username> \
    --registry-password <password>
Replace the following placeholder:
| Placeholder | |
|---|---|
<registry> |
The registry URI in the form <host>:<port>/<namespace>,e.g. my-registry.example.com:443/gitpod. |
<username> |
The username for the registry that has write access (is allowed to push). |
<password> |
The password to the username. |
Next, you can start installing Gitpod like this:
$ kubectl kots install gitpod \
    --kotsadm-namespace <namespace> \
    --kotsadm-registry <registry> \
    --registry-username <username> \
    --registry-password <password>
Replace the following placeholder:
| Placeholder | |
|---|---|
<namespace> |
Namespace that is used in the registry URI above. |
<registry> |
The hostname of your registry, e.g. my-registry.example.com:443. |
<username> |
The username for the registry that has read access (is allowed to pull). |
<password> |
The password to the username. |
You will be asked for the namespace you want to install Gitpod to as well as a password for the admin console. After some time, you will see the following output:
  • Press Ctrl+C to exit
  • Go to http://localhost:8800 to access the Admin Console
Open your favorite browser and go to http://localhost:8800 (port 8800 is opened on your node on localhost only—you may want to forward the port to your workstation in order to access the admin console).
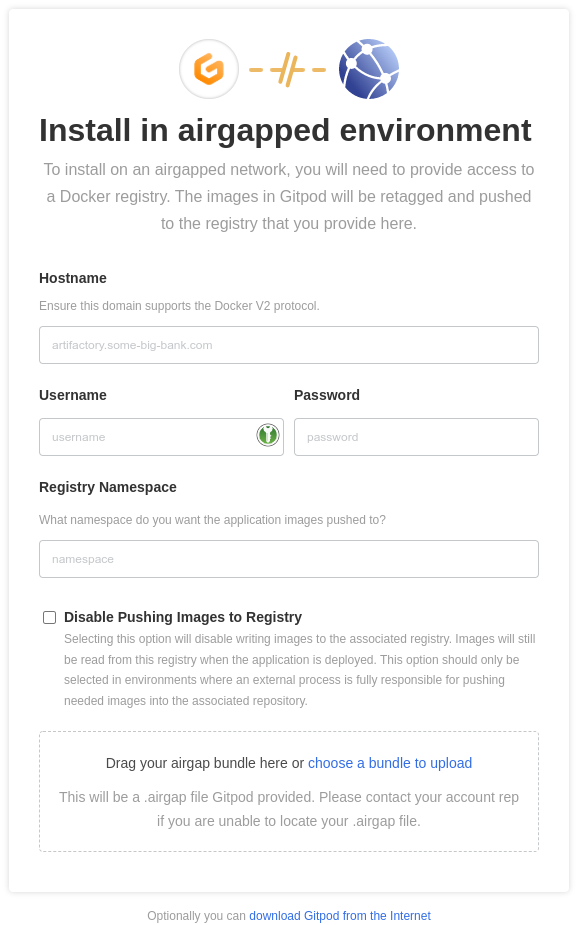
Now, you will be asked for the password and the license. On the next page, you have to set:
- the hostname of your registry (e.g.
my-registry.example.com:443), - username and password (read access), as well as
- the namespace that you used in the registry URI above (e.g.
gitpod).
Click on “choose a bundle to upload” and select your gitpod-<version>.airgap file on your local computer. Then hit the “Upload airgap bundle” button.

Uploading this file and pushing the images to your registry will take a while (could take several hours depending on your internet connection). Grab a cup of coffee or tea and wait for it to be ready. ☕
Once the images has been pushed to your registry, you can continue to install Gitpod as described in the installation guide. Happy coding!