
Sep 21, 2018
Developing a Nuxt.js app entirely in your browser
A walk-through to create a fully working Nuxt.js web application with only a browser, using Gitpod.io the online IDE for GitHub.
Version 2.0 of Nuxt.js has just been released. It comes with a convenient scaffolding tool that let’s you get started in no time. In the following I will explain the steps necessary to create, run and develop a Nuxt.js application with only a browser using Gitpod.io.
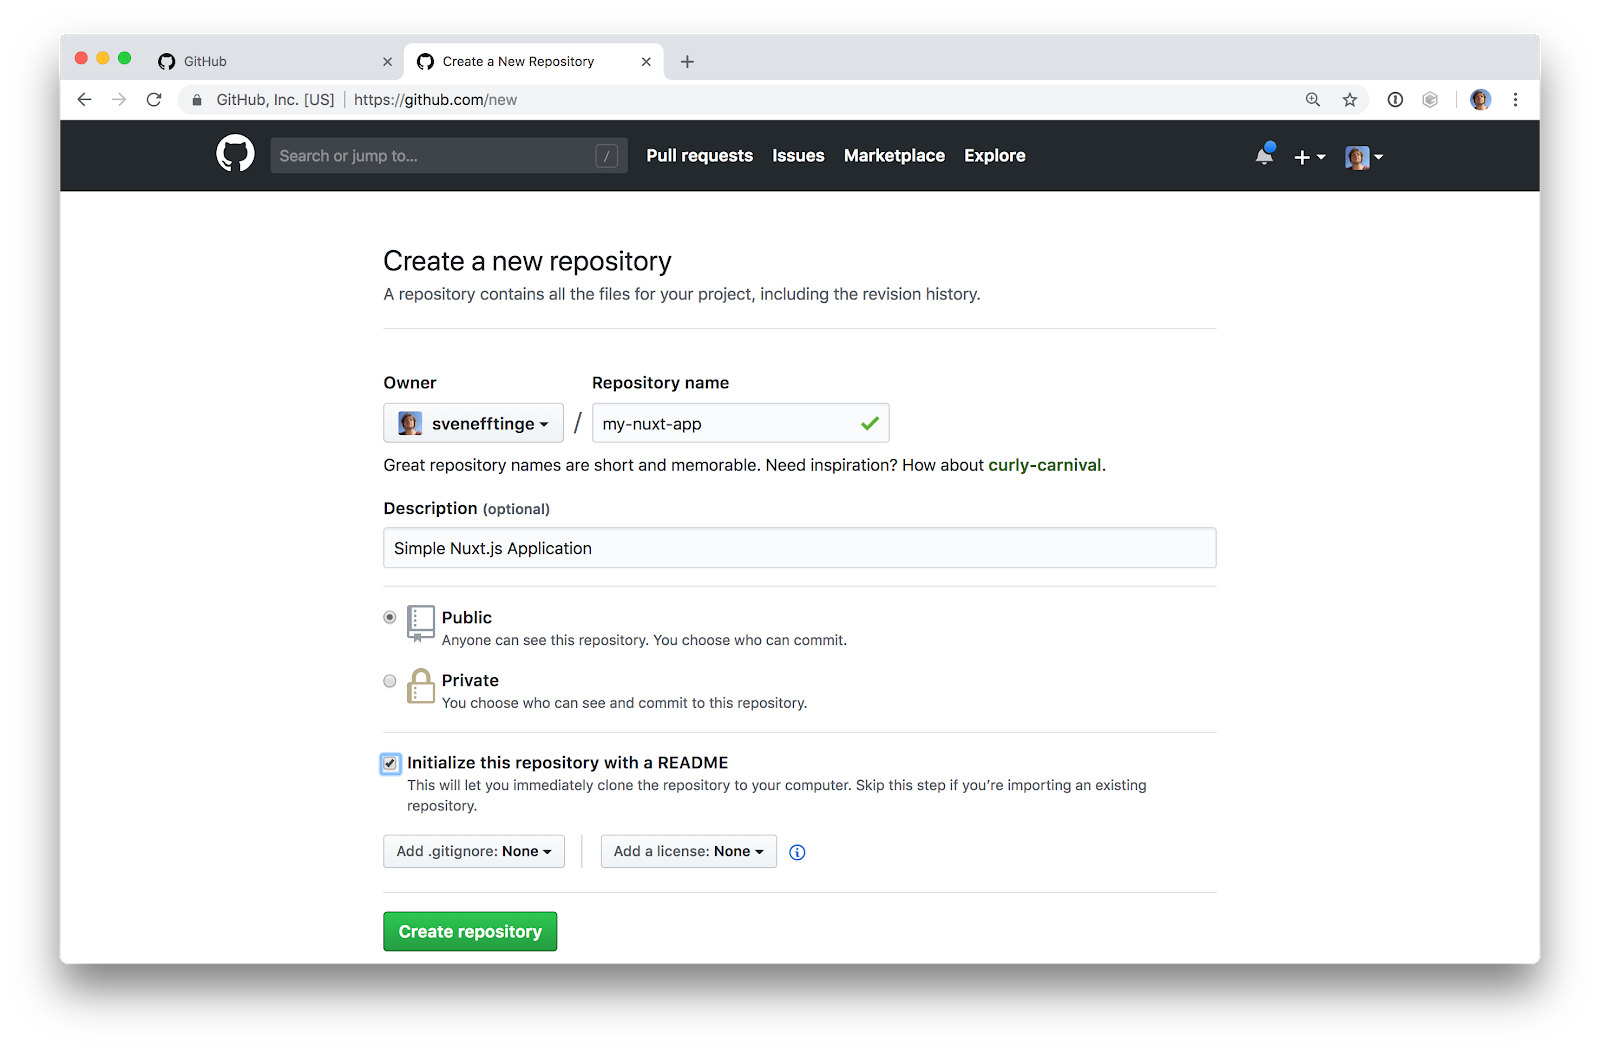
Step 1: Go to GitHub and create a fresh repository.
Gitpod.io uses GitHub as its dashboard. That means you start your workspaces from any states of any GitHub project. So new projects are created through GitHub, too:
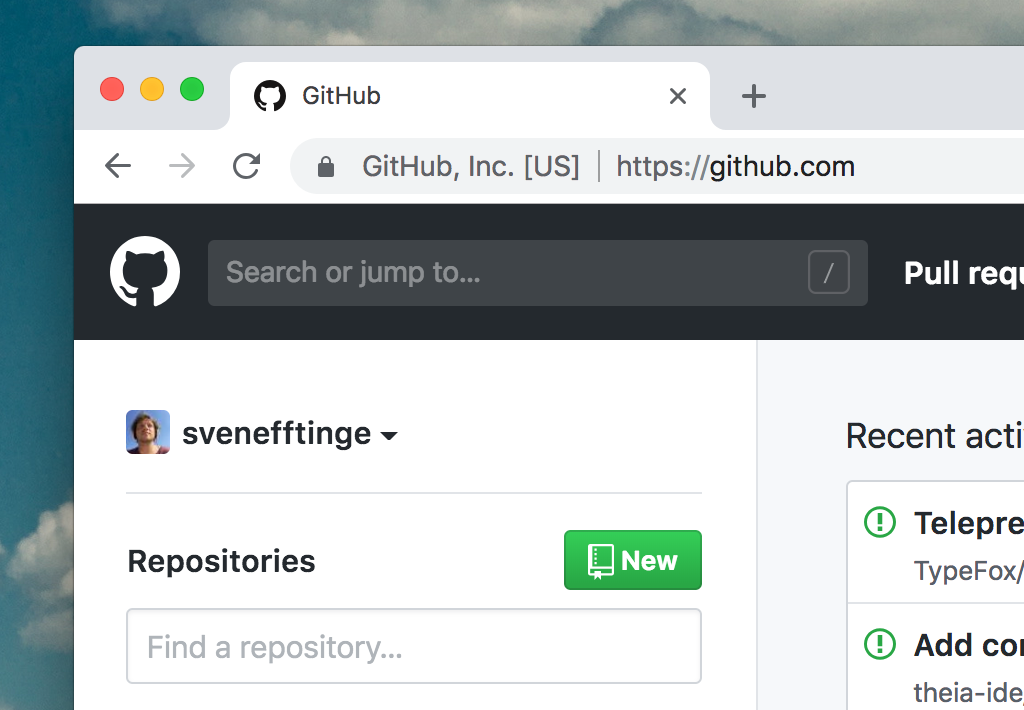
Clicking anywhere on GitHub’s Octocat logo on the top left will bring you to your dashboard, where you can create a new repository.
Enter any name description, you can later change it.
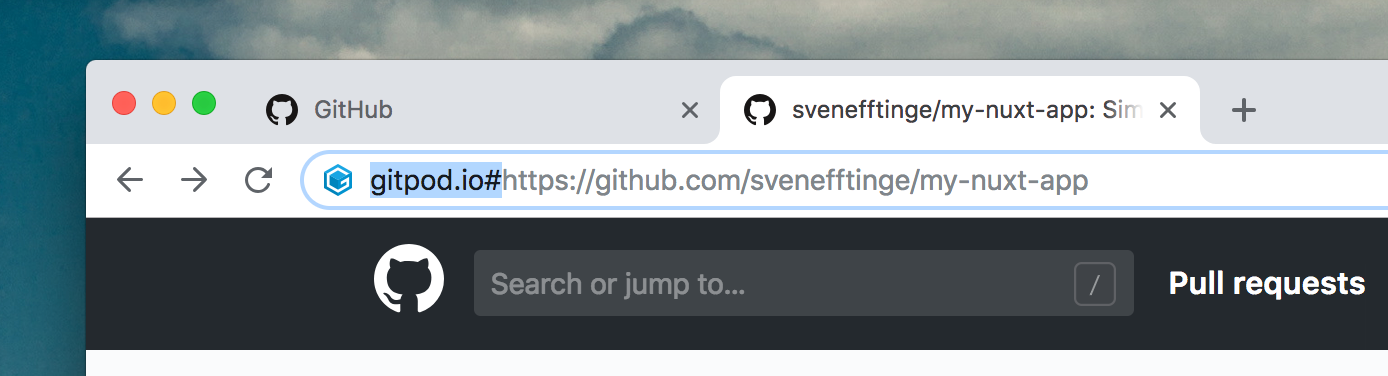
Step 2: Start a Gitpod workspace
From your newly created but still empty project you can now start a Gitpod workspace. To do so prefix the GitHub URL with gitpod.io/#:
Step 3: Run yarn create nuxt-app.
Now a workspace with an online IDE is started for you. It will open up the readme (if you have created one) and a terminal.
Using the terminal you can use create-nuxt-app to create an initial project:

 language:
 **yarn create nuxt-app**Now simply answer all the prompts as you want.
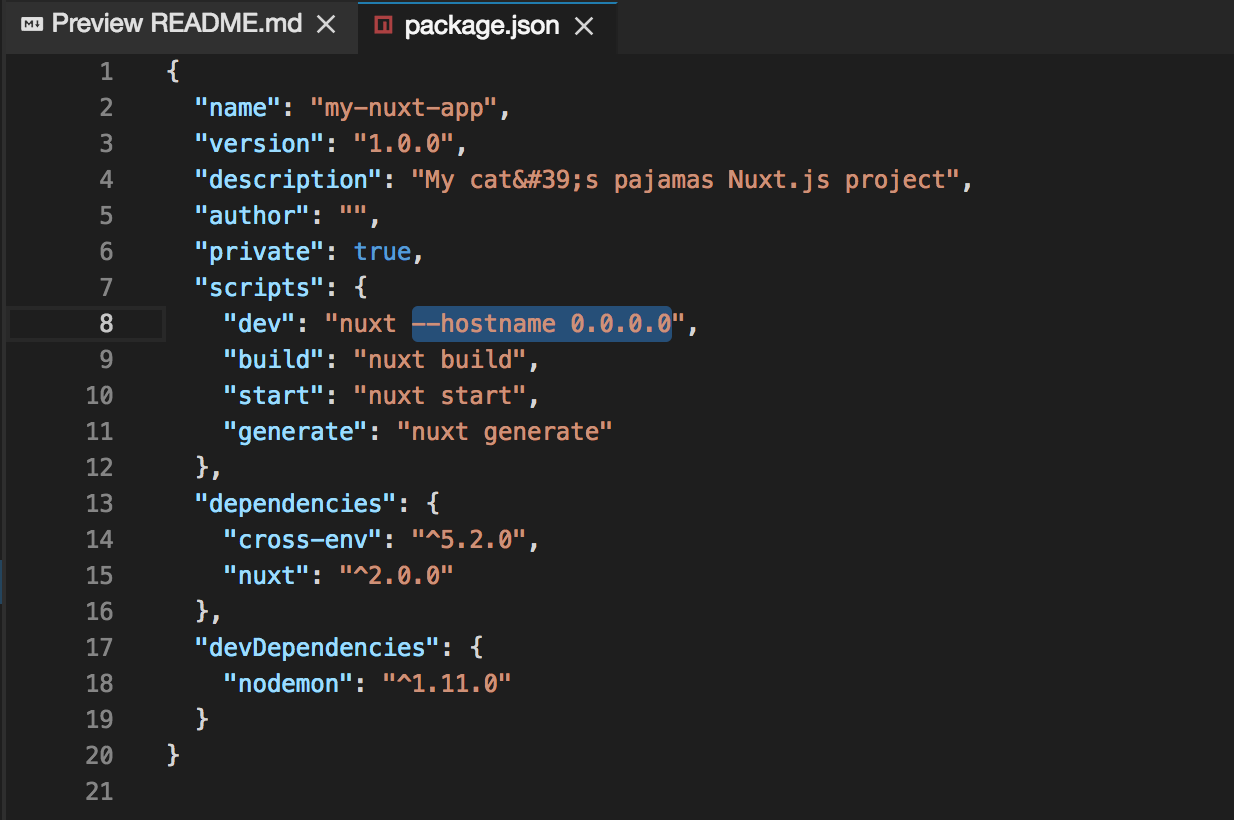
Step 4: Allow external access to the dev server
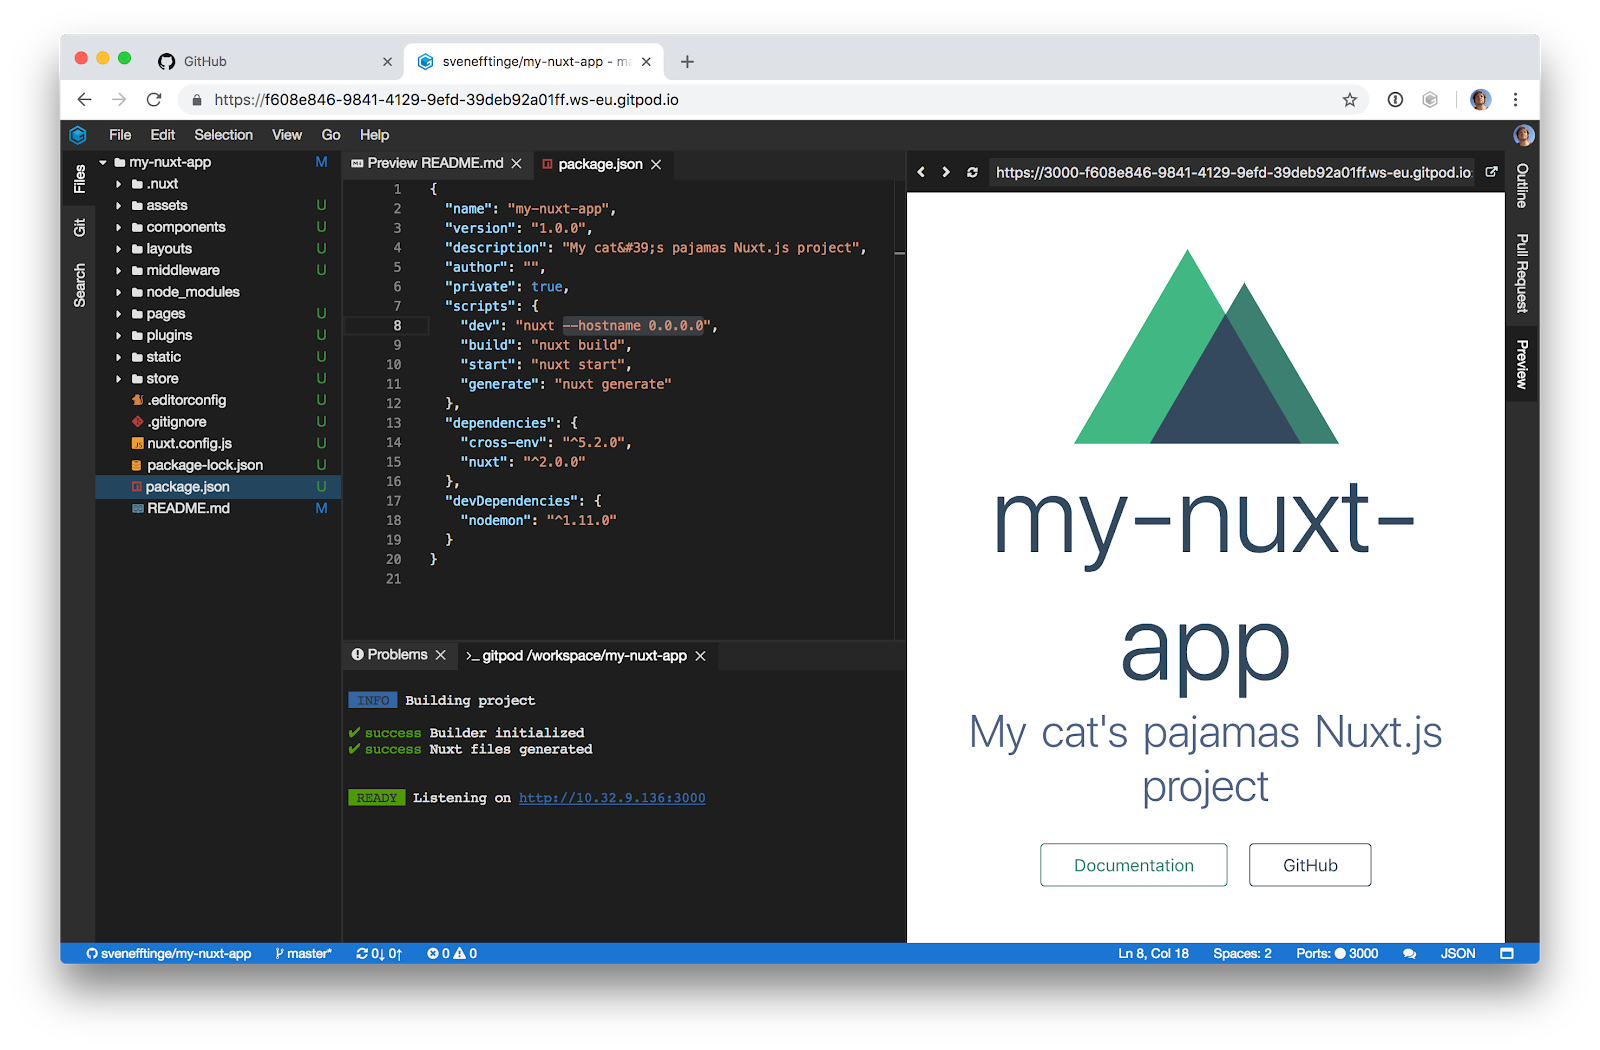
By default the dev server doesn’t allow external IPs. To change that so we can access the application running in our cloud container, we need to pass an additional argument to the dev command.
To do so open the package.json file and add the parameter
language: **—-hostname 0.0.0.0**as shown below:
Step 5: Start the dev server
Now we can start the dev server and see the application in action.
In the terminal type
language: **yarn dev**A notification window will pop up asking you to either open the web app externally or in a view side-by-side to the editor area.
Bonus Points
Now you can start changing the application and of course committing to your repo. Also you should consider adding a .gitpod file to the root directory, so the build and dev server automatically startup next time you open a Gitpod workspace.
Here’s the contents:
language: ports:
- port: 3000
protocol: "http"
tasks:
- command: |
yarn install
yarn devDive deeper into Nuxt.js
Now you are all set to dive a bit deeper into Nuxt.js. Checkout the awesome-nuxt repository or the website for further tips and tutorials.
Have fun!
Share this post


